User Journeys
This section contains role-based documentation for common user workflows in Image Factory.
Quick Start
Read QUICK_START.md first to identify the role-specific guide that matches your workflow.
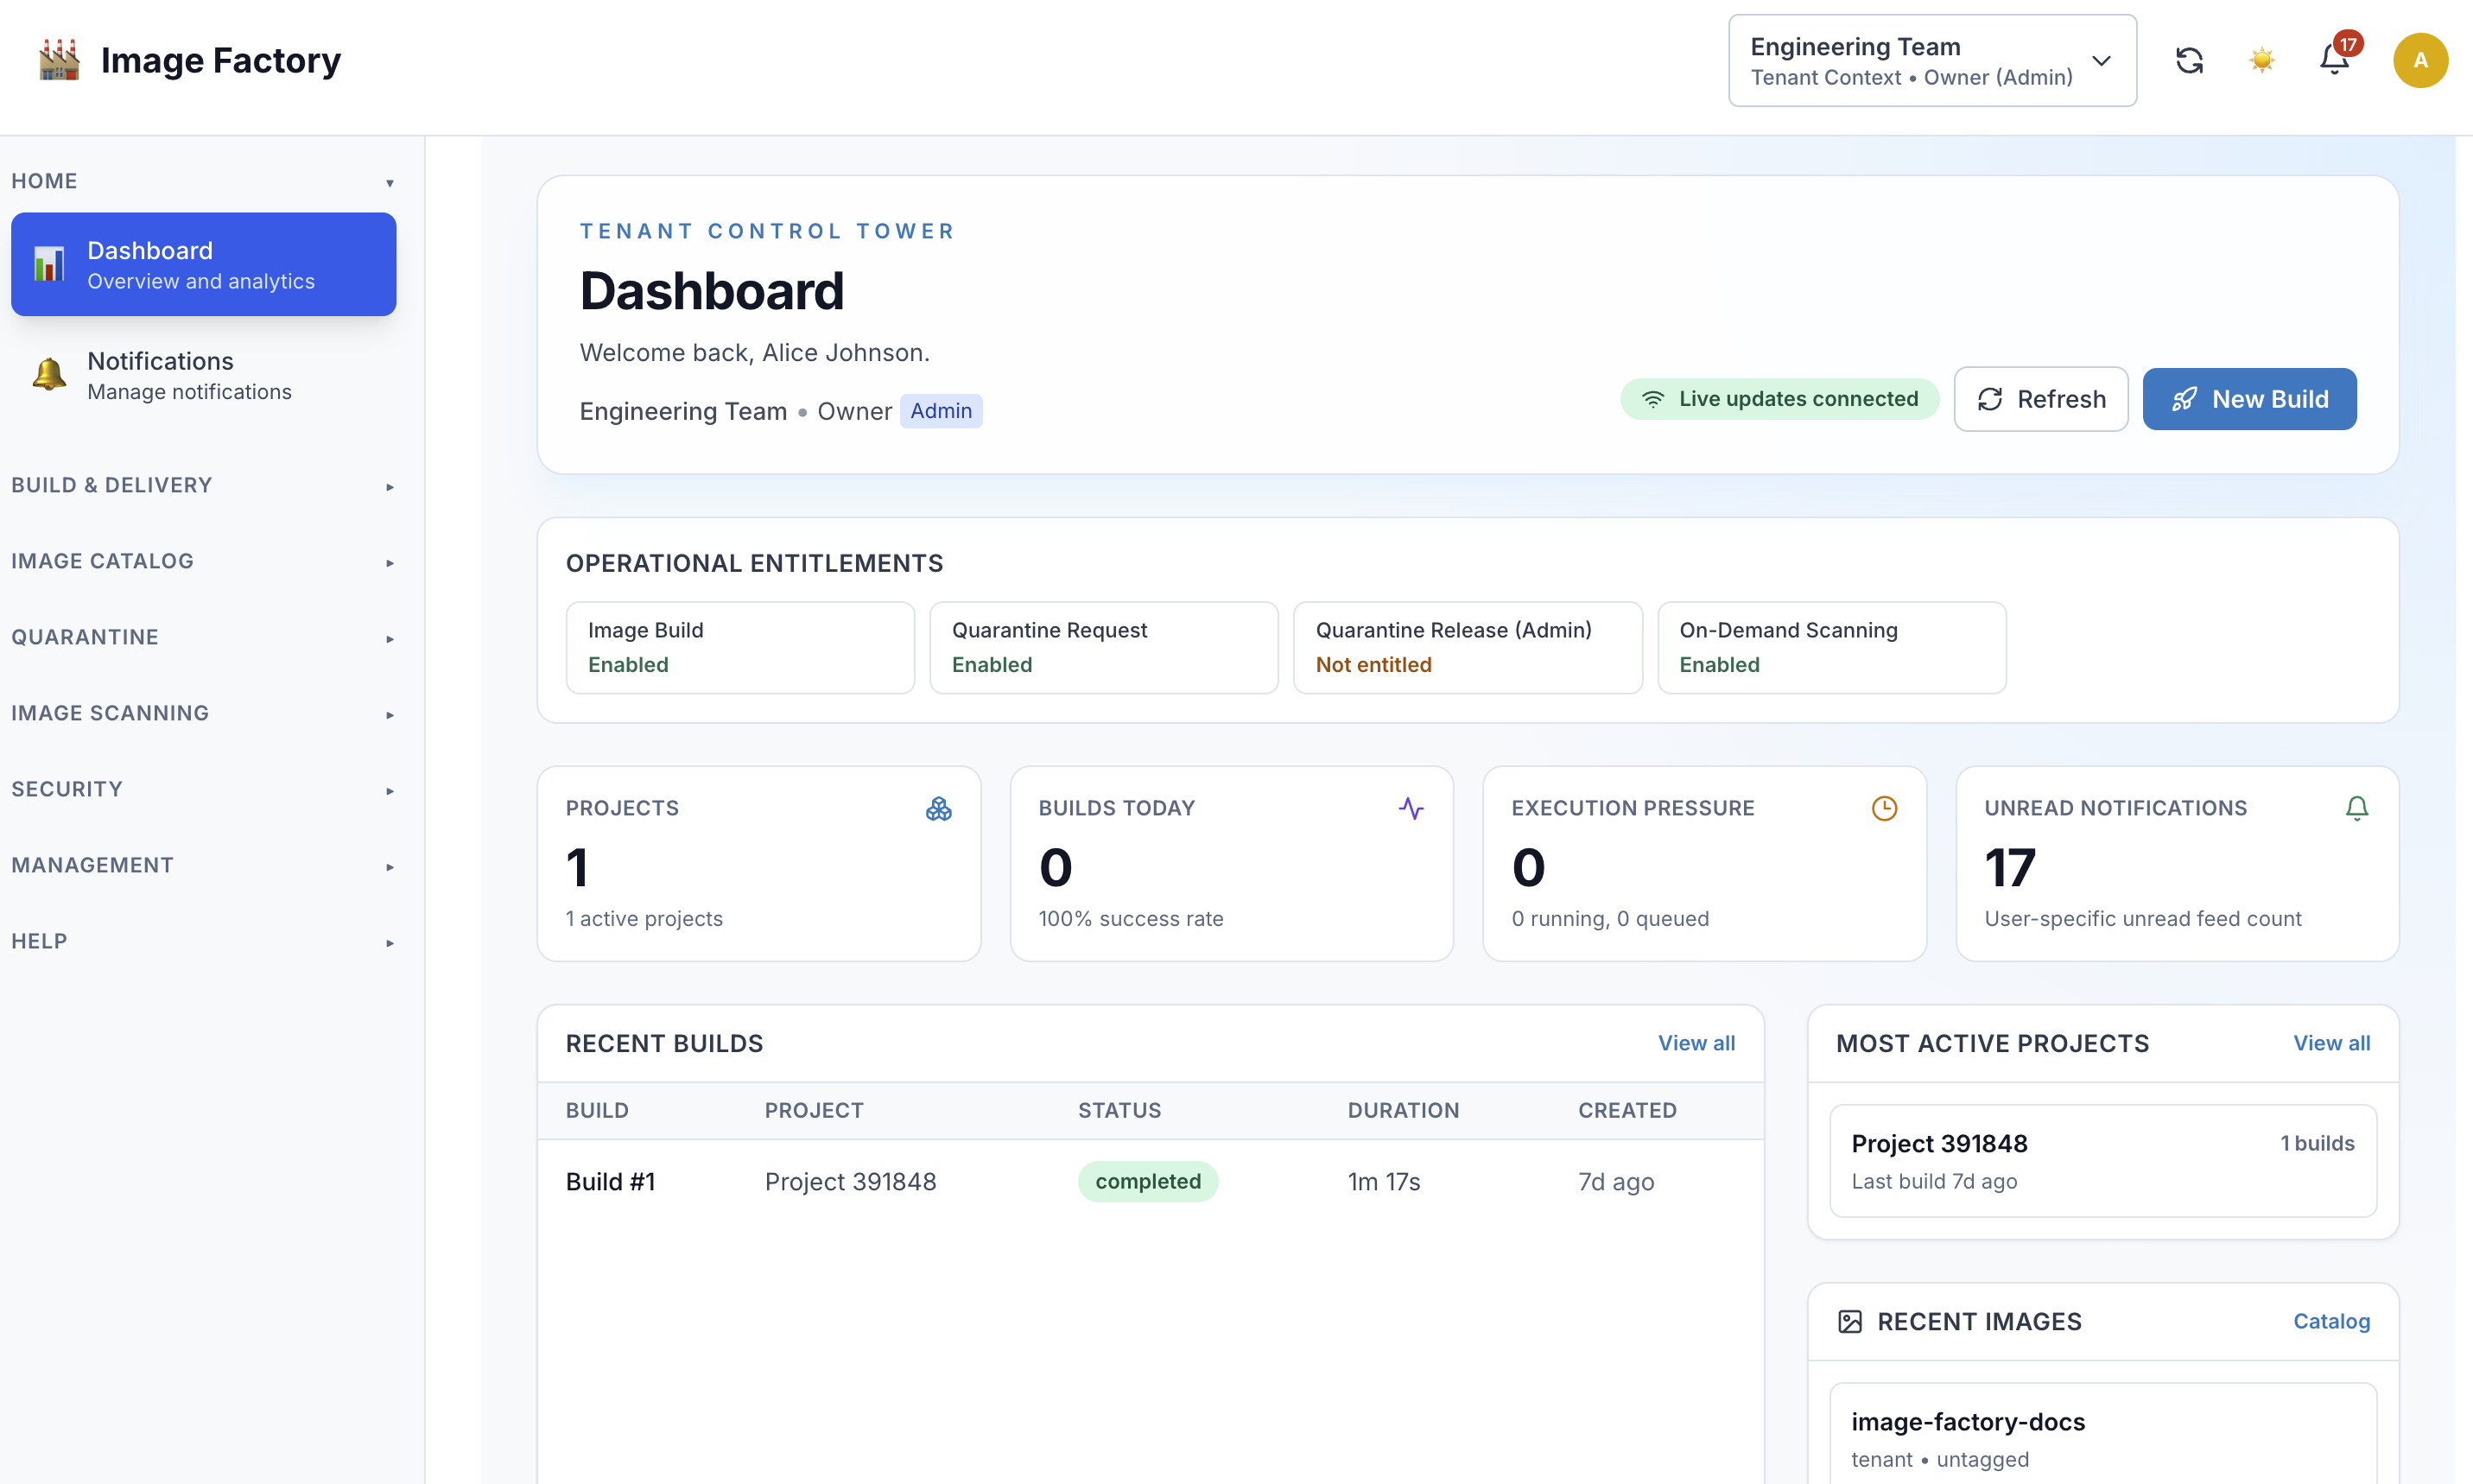
Snapshot
Tenant dashboard:
Role Navigation Map
flowchart TD
    A[Choose Your Role] --> B[Owner]
    A --> C[Admin]
    A --> D[Member]
    A --> E[Viewer]
    B --> F[Strategy, Team, Billing]
    C --> G[Projects, Members, Configuration]
    D --> H[Builds, Logs, Artifacts]
    E --> I[Monitoring, Reporting, Audit]
Workflow Coverage
flowchart LR
    A[User Journeys] --> B[Build Creation]
    A --> C[Project Administration]
    A --> D[Team Management]
    A --> E[Monitoring And Audit]
    A --> F[Quarantine And Messaging]
Overview
Each role in Image Factory has a unique set of capabilities, workflows, and responsibilities. These documents provide detailed user journeys showing exactly what each role can do, how they work, and what their typical day looks like.
Available Roles & Documents
| Role | Document | Focus | Users |
|---|---|---|---|
| Owner | OWNER_JOURNEY.md | Tenant strategy, team management, billing | Founders, executives |
| Admin | ADMIN_JOURNEY.md | Project management, team coordination | Project leads, senior developers |
| Member | MEMBER_JOURNEY.md | Building, testing, collaboration | Developers, engineers |
| Viewer | VIEWER_JOURNEY.md | Monitoring, reporting, oversight | QA leads, managers, auditors |
| Unified Messaging | UNIFIED_MESSAGING_JOURNEY.md | Event flow and notification testing | Backend, QA, DevOps |
| Dispatcher Testing | DISPATCHER_JOURNEY_TESTING.md | Queue-to-execution validation | Backend, QA, DevOps |
| Quarantine Capability UX | QUARANTINE_CAPABILITY_JOURNEY.md | Capability-gated onboarding, login, and quarantine flows | Product, Backend, Frontend, QA |
| Quarantine Process Guide | ../overview/QUARANTINE_PROCESS_GUIDE.md | Admin and tenant operating guide for quarantine process | Admins, tenant users, support |
How to Use These Documents
For New Users
- Start with QUICK_START.md to identify your role (5 min)
- Read your role's journey document (15-20 min) - pick from table above
- Follow the "Getting Started" section in your journey
- Reference the quick actions as needed during work
For Team Leaders
- Share this folder with new team members
- Direct them to QUICK_START.md first
- Share role-specific docs by assignment
- Use success criteria to verify onboarding
- Reference specific workflows in training
For Trainers And Team Leads
- Use QUICK_START.md as the first handoff document
- Share the role-specific guide that matches the person’s day-to-day work
- Reference specific journeys during onboarding or shadowing sessions
- Use workflow sections as a practical checklist for early adoption
Common Workflow Areas
- Build creation and execution
- Project and member management
- Notifications and operational follow-up
- Quarantine intake and review
- Reporting, audit, and oversight
What To Expect In Each Guide
Most role guides include:
- a role overview and capability summary
- getting-started steps
- common daily or weekly workflows
- detailed task walkthroughs
- pointers to related reference material
Typical User Journeys
Journey 1: Building & Execution
Who: Members, Admins, Owners
Focus: Creating and monitoring builds
Steps:
- Create build manifest
- Start build
- Monitor execution
- Download artifacts
- Deploy/use results
Success: Build completes and artifacts are usable
Journey 2: Team Management
Who: Admins, Owners
Focus: Managing team members and access
Steps:
- Invite team members
- Assign roles
- Configure permissions
- Monitor activity
- Make adjustments
Success: Team has right access, roles match responsibilities
Journey 3: Project Configuration
Who: Admins, Owners
Focus: Setting up projects
Steps:
- Create project
- Configure build methods
- Set up integrations
- Configure notifications
- Create templates
Success: Project is operational and team can build
Journey 4: Monitoring & Oversight
Who: Viewers, Admins, Owners
Focus: Tracking performance and quality
Steps:
- View analytics
- Analyze trends
- Identify issues
- Generate reports
- Make improvements
Success: Issues identified, trends understood, improvements planned
Journey 5: Troubleshooting
Who: All roles (especially Members)
Focus: Fixing failed builds
Steps:
- Identify failure
- Review logs
- Find root cause
- Fix issue
- Verify resolution
Success: Build succeeds, root cause fixed, team informed
Permission Matrix
By Role
                Owner    Admin    Member   Viewer
────────────────────────────────────────────────────
View Projects   ████     ████     ████     ████
Create Project  ████     ░░░░     ░░░░     ░░░░
Delete Project  ████     ░░░░     ░░░░     ░░░░
View Builds     ████     ████     ████     ████
Start Build     ████     ████     ████     ░░░░
Cancel Build    ████     ████     ░░░░     ░░░░
Download Logs   ████     ████     ████     ████
View Artifacts  ████     ████     ████     ████
Download Artifact ████   ████     ████     ████
Manage Team     ████     ████     ░░░░     ░░░░
Edit Settings   ████     ████     ░░░░     ░░░░
View Analytics  ████     ████     ░░░░     ████
View Billing    ████     ░░░░     ░░░░     ░░░░
Access Levels
████ = Full Access / Can do
░░░░ = No Access / Cannot do
Quick Reference by Task
I Need to...
...start a build
→ Member/Admin/Owner
→ See MEMBER_JOURNEY.md - Journey 1
...manage team members
→ Admin/Owner
→ See OWNER_JOURNEY.md - Journey 2
...configure a project
→ Admin/Owner
→ See ADMIN_JOURNEY.md - Journey 3
...view analytics
→ Viewer/Admin/Owner
→ See VIEWER_JOURNEY.md - Journey 3
...troubleshoot a failure
→ All roles
→ See MEMBER_JOURNEY.md - Journey 4
...manage project integrations
→ Admin/Owner
→ See ADMIN_JOURNEY.md - Journey 3
...audit activity
→ Viewer (especially) / Owner
→ See VIEWER_JOURNEY.md - Journey 5
...generate a report
→ Viewer/Admin
→ See VIEWER_JOURNEY.md - Journey 3
Role Hierarchy And Dependencies
flowchart TD
    A[Tenant Owner] --> B[Project Admin]
    B --> C[Project Member]
    B --> D[Project Viewer]
    A --> E[Tenant Oversight]
    B --> F[Project Coordination]
    C --> G[Build Execution]
    D --> H[Monitoring And Reporting]
Typical Adoption Path
Most teams can onboard effectively by following this order:
- identify the user’s role with QUICK_START.md
- read the matching role guide
- complete one common workflow such as build creation, project administration, or audit review
- return to the guide as a working reference for less common tasks
Related Documentation
For more information, see:
- DOCUMENTATION_INDEX.md - All documentation
- RBAC Documentation - Role definitions
- BUILD_MANAGEMENT_GUIDE.md - Build system details
Using These Guides
Use the role guides in three common situations:
- onboarding a new user into the correct role and first workflow
- clarifying permissions or expected responsibilities across roles
- finding the right workflow reference when a task is unfamiliar
When a question is feature-specific, start from the role guide and then follow the linked reference documentation.
This section is intended as a practical map to the role and workflow guides included in the published documentation set.